|
Central Data Service |
||
|
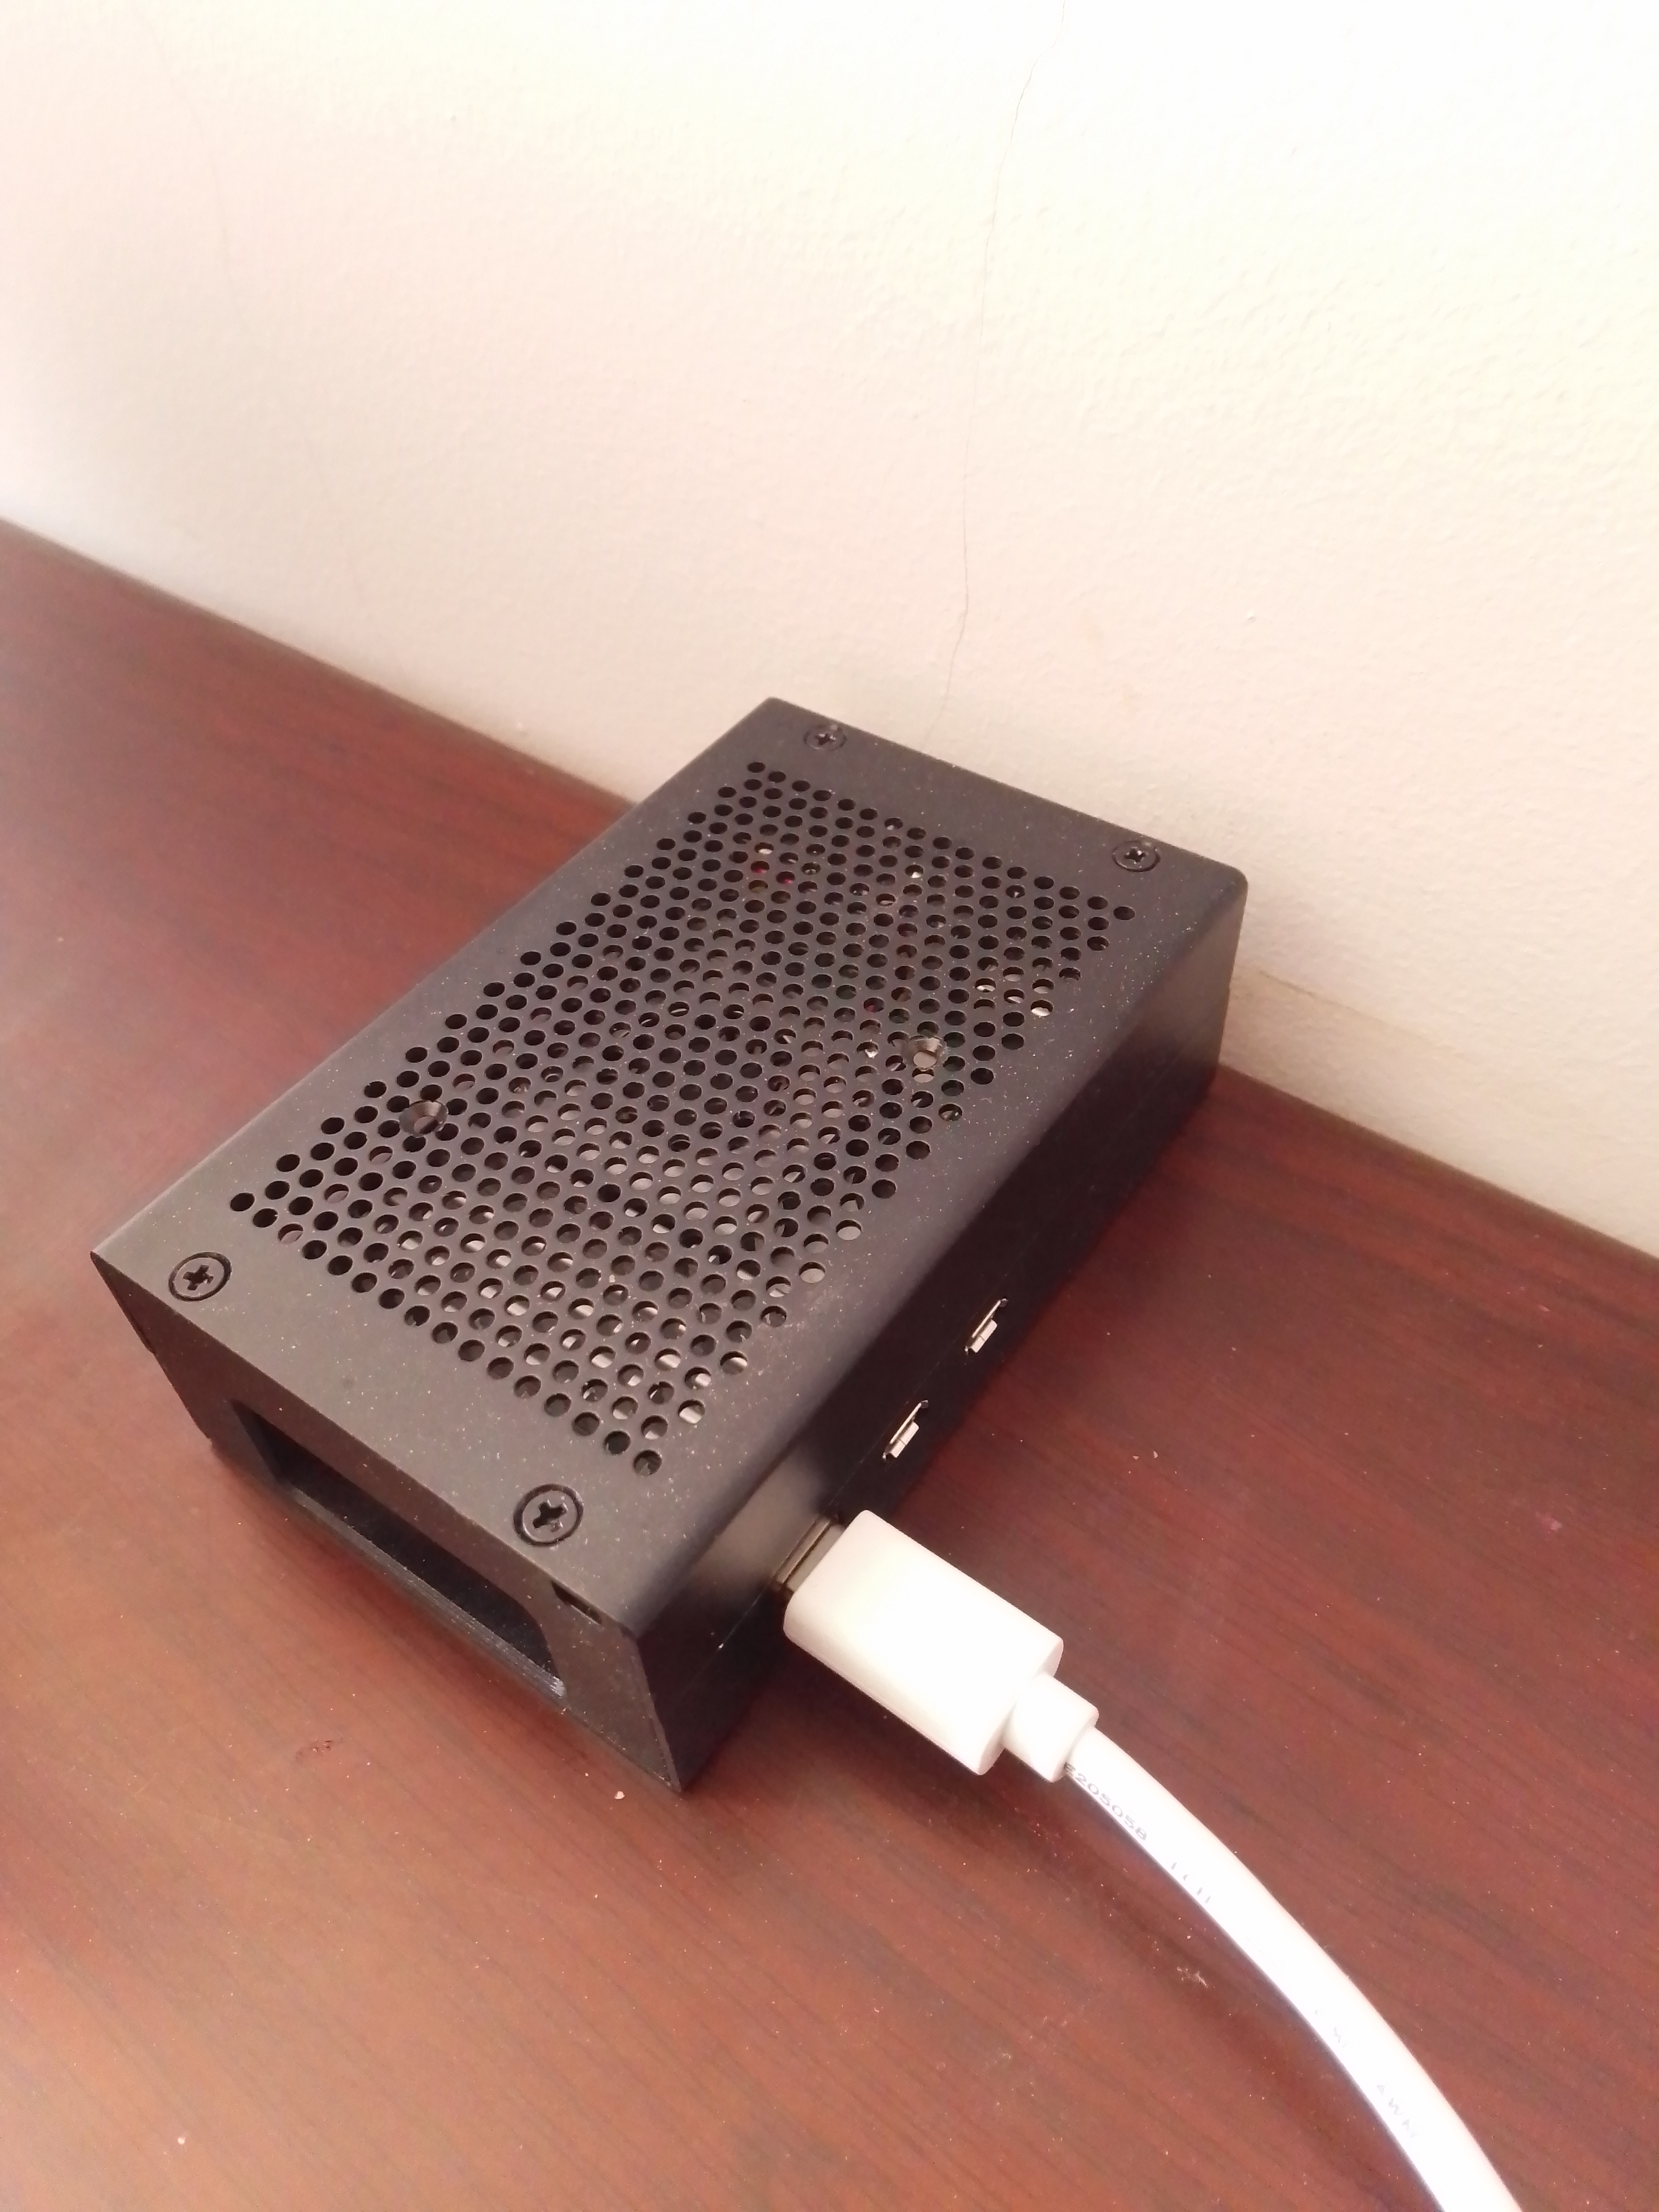
Setting up your own website using a Raspberry PI computer and Lighthttpd webserver | ||
|
Email : [email protected] (44) (0) 7943055280 |
||
I have been writing about setting up a website from my home on a Raspberry Pi 3. Despite the fact that this is not a project that I expect to appeal to the average person who is likely to visit this website, I decided to post an article about the experience. Hopefully this will benefit a few people who happen to stumble across it on the Internet.
You may ask why anyone would want to host a website from his home. Hosting a website on someone else's computer can cost as little as �10 a month. So, why would you want to do it yourself? Well, it is still �120 a year, and in an expensive country like the UK, it is yet another bill to pay. The best reason, however, is that you get a tremendous amount of control. You decide exactly what your website looks like and how it functions. You can update it as often as you want and nearly instantaneously. You can run with as much or as little computing power and storage space as you want. No one owns or has control of your visitors' comments, your email mailing list, or your advertisements. You follow no one's rules but your own. You don't need anyone's permission to keep your website online. You can make it as secure as Fort Knox, provided you have the knowledge to do so. Okay, that is a bit of an exaggeration, but you get the picture. And, the last reasons are that it's fun, and you can learn a lot about how servers and the Internet actually work. Oh, I almost forgot the other important reason. Even for an austere person like me, it's really, really cheap! Try �2-a-year-for-electricity cheap (not counting �35 for a Raspberry Pi 3 and �10 for a flash card).
Now for the downside. Hosting a website is a LOT of work. I'm not overstating this. Expect to put at least 50 hours of work into this to get all the way to the end. And that doesn't include writing the content to put on your website. And that's if you already have the following knowledge and skills:
A basic-to-intermediate level of familiarity with the Linux command line.
A basic understanding of Linux networking
A working knowledge of basic HTML programming
At least a small amount of experience with the Raspberry Pi
A basic understanding of router security and maintenance
No fear of learning new things
If you are missing some of the above, you may want to learn some things before continuing on.
You'll also need the following hardware:
A computer for copying the Raspbian image to a micro SD card.
A Raspberry Pi 3 (or 4) computer and power plug
A desktop monitor, mouse, and keyboard
A high-speed 8 or 16 GB micro flash card
A router connected to the Internet
An Ethernet cable
The monitor, mouse, and keyboard will only be needed during the setup of the web server. Software for copying the Raspbery Pi OS image to an micro SD card now exists for Windows, Mac, and Linux computers. I have pulled the micro SD card containing Raspberry Pi OS out of a Raspberry Pi 3 and plugged it into a Raspberry Pi 4, and it seemed to work perfectly. So, as far as I know, all of the instructions in this article will work for setting up a website on a Raspberry Pi 4.
The amount of material that has to be covered to get you to the point where you have your own website running from your home is so large that there is no way I can cover it all in one . So, what I will do is give you a good overview of the whole process--from installing your operating system on your Raspberry Pi 3 all the way to search engine Optimisation. I'll give you the bones with some meat on them. Where I can't include some of the finer points, I will supply links to the best websites I have found that cover the goriest of the details. And, I will tell you what the experience was like for me. I will tell you what was difficult for me, what was frustrating, and what I just couldn't figure out. It will be like having someone describe in detail what it's like to go to the toilet in a foreign country, without ever having to leave the privacy of your own bathroom. Here are the topics I'll cover, roughly in the order that you should encounter them if you decide to do this yourself:
Predicting the Performance of a Raspberry Pi 3 as an HTTP Server
Installing Raspberry Pi OS onto the Raspberry Pi 3
Basic Raspberry Pi 3 Configuration
Connecting the Raspberry Pi to Your Router
Installing the Lighttpd HTTP Server
The Basics of Setting up Lighttpd
Creating Your First Webpage
Enabling PHP7
Counting the Number of Visitors to Your Website Pages
Using RAM for Log Files
Setting File Permissions
HTTPS Configuration
HTTPS Self-Certification
Making a Backup
Adding Users and Strengthening Raspberry Pi Security
Enabling/Disabling User Logging
Disabling Hotlinking
Monitoring Lighttpd Status (not User Logging)
Password Protecting the Lighttpd Status Page
Enabling Lighttpd monitoring
Web Page Compression
Creating a Static Local Network IP Address for the Raspberry Pi
Setting up a Static IP Address for Your Home Internet Service
Initial Router Checkup--Including Updating Your Router's Firmware
Getting an Internet Domain Name for Your Website
Router Port Unblocking and Router Port Forwarding
Adding Let's Encrypt SSL/TLS Certificates
Strengthening TLS Security
Monitoring Your Server for Problems
Making Another Backup
Updating Raspberry Pi OS Regularly
Going through Browser Hell--Writing Html Pages
Fleshing out Your Website--privacy page, sitemap, robots.txt
Submitting Your Website to Google
Website Analysis
Search Engine Optimisation
That's an intimidating list! In the process of correcting errors in this article, I went through the process again of setting up a web server from the section on "Installing Raspbian Jessie on the Raspberry Pi 3" to the section on "Creating a Static Local Network IP Address for the Raspberry Pi". It took me exactly 20 hours. So, when I say it will probably take you at least 80 hours to go through the whole process from beginning to end for the first time, that's not an exaggeration. But if you decide to go through with this, at the end of the process you will have your own website on the Internet with which you can do whatever you want--as long as you don't break any laws.
Let's get started!
Before beginning any new endeavour, an intelligent person would assess the situation to see if it can even be done. Okay, I didn't do that, but let's start this article that way. We want to know how many visitors a basic website running on a Raspberry Pi 3 can handle before it starts having problems. People usually use one of three http servers on the Raspberry Pi: Apache, Lighttpd, or Nginx. I chose Lighttpd (pronounced "Lighty") for three reasons. It's fast, it doesn't require much RAM, and I have previous experience with it.
Fortunately, Jeremy Morgan has done some bench testing of Lighttpd on a Raspberry Pi (not a Pi 3). His testing data is rather difficult to generalise, but the bottom line seems to be that the Lighttpd server can handle up to 200 concurrent connections before it starts having significant problems. That's 200 people all downloading something at the same time. For Jeremy's worst case scenario where 200 people are connected and downloading a large (98 KB) text file, the download time is an average of 35 seconds.
If I interpreted his results correctly, this means the following. The average html page has about 1000 words of text on it, which corresponds to about a 12 KB if you write the html code yourself. It would be significantly more if you use web design software to write it for you. But I'll assume for this article that 12 KB is the average text size because I'm assuming you will be writing your own html code. A medium-sized picture (500x350 pixels compressed into a jpg format with reasonable quality) is about 25 KB. Together those are significantly less than 98 KB, so using the large-text results to characterize our possible results would be conservative. Notice that I've assumed "static" web pages with no PHP or Javascript running. Dynamic web pages would require more CPU overhead. Two hundred static page downloads divided by 35 seconds is 5.71 downloads per second. Since we know that website usage will not be constant over a 24 hour period, let's conservatively divide that number by 4 to say that on average 1.43 average-sized html pages with a medium sized picture can be downloaded every second of the day. That means that conservatively 123,000 pages can be served per day, or 3.7 million pages per month. Those are absolutely huge numbers! Far higher than the wildest dreams of someone who is creating a new website. Even if I'm a factor of 10 too high, we're still very much okay.
The next questions are, does your home Internet connection have the upload bandwidth to handle this, and how big a bite will this take out of your data cap each month. Let's assume a relatively slow upload capability of 1 Mb/s (that's megabits, not megabytes). This would correspond to something like a 6 Mb/s download capability. Many people have 50 or 100 Mb/s download, and a broadband connection in the US is now defined as a download capability of 25 Mb/s or higher. So, once again, 1 Mb/s is conservative. So, 1 Mb, or 1024 Kb, or 128 KB, divided by 37 KB (12 KB for text + 25 KB for pictures) is 3.46 files per second that we can upload (remember that a byte (B) is eight bits (b)). That is more than our conservative estimate for how much Lighttpd on the Raspberry Pi can handle. So, once again, we are fine. Now, as far as the data cap goes, let's assume that we're uploading 1.43 html pages per second for one month. That comes out to 137 GB of data. Since most residential Internet connections have data caps of 1 terabyte, we're still alright. Serving 3.7 million, 37 KB pages per month should not cause us to exceed our monthly data cap.
What all this means is that as long as you don't go crazy with very large pictures and/or significant use of PHP or Javascript, running Lighttpd on a Raspberry Pi 3 should work just fine for serving webpages from your home-based Raspberry Pi 3 web server.
UPDATE (11-1-19): I recently had the opportunity to observe the performance of a Lighttpd web server running on a Raspberry Pi 3 while connected to the Internet under "heavy" load. Visitors viewed a single, small HTML webpage containing 7KB of text and a 46KB jpg picture more than 20,000 times in a 12-hour period. That is the equivalent of once every 2.16 seconds or 1.2 million times a month. As far as I could tell, not only did the Raspberry Pi 3 not crash, it continued to run just fine with no significant slowdown. I think this is proof that just about anyone who wants to run their own website with static or nearly static webpages from home should feel confident running it on a Lighttpd/Raspberry Pi 3 web server.
When I first installed an operating system onto a Raspberry Pi 3 web server in 2018, I used Raspbian Jessie because Raspbian Stretch didn't work for me. Then, a little more than a year later, I upgraded to Raspbian Stretch. Whatever bug had initially existed must have been fixed because it worked fine. Eight or nine months after that, I needed to increase the strength of the web server's security by disabling TLS 1.0 and TLS 1.1. Unfortunately, the version of Lighttpd that comes with Stretch was not new enough to make that change. I would have to upgrade to Buster to get a newer version of Lighttpd. So, I tried to upgrade to Raspbian Buster, which had in the mean time been renamed to Raspberry Pi OS. The upgrade was not successful, so I had no choice but to start over with a clean install of Raspberry Pi OS. Anyone who is reading this for the first time should begin with the latest version of Raspberry Pi OS anyway, so I updated this article by writing about the installation of Raspberry Pi OS and removing all references to Jessie and Stretch.
Many websites give the details of installing Raspberry Pi OS on a flash card. Here is the official documentation that explains how to install the Raspberry Pi OS. It is easy, even if you have not done it before. Basically, it involves downloading and using a program called Raspberry Pi Imager on a Windows, Mac, or Linux computer to set up a bootable 8 or 16 GB flash card with Raspi OS on it. The procedure is the same for all Raspberry Pi operating system variants of which I am aware.
A word of caution should be given to those of you who are new to Raspberry Pi's. Sometimes, when you insert a micro flash card with a working operating system into the flash card reader of a Raspberry Pi, the red power light will come on, but the green light will not flash. The Raspberry Pi will appear to be dead--meaning that it does not do anything, and you cannot even see it on the network. This appears to be caused by a misalignment of the flash card's contacts with the reader's pins. When this happens, pull the power plug on the Raspberry Pi, take out the card, re-insert it, and re-apply power.
Here is a procedure to follow to shut down the Raspberry Pi if you ever lose communication with it in "headless" mode (without a monitor attached). Connect a keyboard. Press the "ctrl" key, the "alt" key, and the "t" key all at the same time to bring up a terminal window (even though you can't see it). Now type:
sudo shutdown -h now
You
should see the green light flash several times as the Raspberry Pi
shuts down. Twenty seconds after the last green light flash, you can
unplug the Raspberry Pi from the electrical outlet. Wait ten more
seconds before you remove the micro SD card, just to make sure no
residual charge remains. I can't tell you how many times I corrupted
the operating system before I realised that this was happening.
Connect the Raspberry Pi to a desktop monitor, mouse, keyboard, router via Ethernet cable, and power plug. Now turn on the monitor and within a couple of seconds connect the Raspberry Pi power plug to an electrical outlet. When the Raspberry Pi OS boots for the first time, it will automatically bring up a wizard to guide you through the basic configuration. Switch from the default UK keyboard to the US keyboard, or you will not be able to type the pipe symbol ("|") in a terminal window. I do not know anything about non-English language keyboards, so if you are not an English speaker, you will have to solve that problem yourself. Follow the rest of the configuration instructions, and update the operating system when prompted.
Before we can do any networking on the Raspberry Pi, we will have to enable the SSH daemon. Open the menu from the menu bar at the top of the screen. Go to Preferences/Raspberry Pi configuration, and then click on the Interfaces tab. Click the "Enabled" radio button next to "SSH". If you speak English, click on the "Localization" tab, and check that the keyboard is set to a US keyboard. Then click "OK". Now, go to the menu in the menu bar and click on "Shutdown". To prevent operating system file corruption, always remember to wait 20 seconds after the green LED stops flashing before you disconnect the Raspberry Pi power plug from the electrical outlet. I also wait another 10 seconds after unplugging the Raspberry Pi before removing the SD card, just to make sure any capacitive charge has dissipated. You can now disconnect the monitor, mouse, and keyboard. We are now ready to connect the Raspberry Pi to your router (or directly to your Linux computer).
You can also start the SSH daemon from the Linux command line using the "sudo systemctl start ssh". To ensure that the SSH daemon starts automatically each time the Raspberry Pi boots, use the "sudo systemctl enable ssh" command.
I will assume in this article that you will be communicating with the Raspberry Pi by SSH from a Linux computer. You can either connect directly to the Raspberry Pi over an Ethernet cable, or you can connect the Raspberry Pi to your router and connect your Linux computer to the router via Ethernet cables. I will assume the latter.
To find the IP address of your Linux computer, in a terminal window (AKA "the Linux command line") on your Linux computer type:
ifconfig
The
response should look something like this:
mint@mint ~ � ifconfig
eth0      Link encap:Ethernet  HWaddr 00:19:75:ad:10:85
          inet addr:192.168.0.63  Bcast:192.168.0.255  Mask:255.255.255.0
          inet6 addr: fe80::221:70ff:fead:1885/64 Scope:Link
          UP BROADCAST RUNNING MULTICAST  MTU:1500  Metric:1
          RX packets:23771 errors:0 dropped:0 overruns:0 frame:0
          TX packets:16500 errors:0 dropped:0 overruns:0 carrier:0
          collisions:0 txqueuelen:1000
          RX bytes:28814774 (28.8 MB)  TX bytes:1755239 (1.7 MB)
          Interrupt:22 Memory:f6fe0000-f7000000

lo        Link encap:Local Loopback
          inet addr:127.0.0.1  Mask:255.0.0.0
          inet6 addr: ::1/128 Scope:Host
          UP LOOPBACK RUNNING  MTU:65536  Metric:1
          RX packets:2483 errors:0 dropped:0 overruns:0 frame:0
          TX packets:2483 errors:0 dropped:0 overruns:0 carrier:0
          collisions:0 txqueuelen:0<
          RX bytes:268017 (268.0 KB)  TX bytes:268017 (268.0 KB)
The Linux networking commands have been deprecated in Debian 12, so ifconfig may no longer work. If it doesn't, try "ip address" instead.
Even though you should already be pretty familiar with this, I will go slowly here just to make sure we are starting off on the same page. The above response from ifconfig shows that your Linux computer has an IP address of 192.168.0.63. Now, download a program called nmap. (Note that nmap has been deprecated in Debian 12, so you may have to use nmcli instead.) If you have apt-get on your Linux computer, type:
sudo apt-get install nmap
After
nmap has been installed, type:
sudo nmap 192.168.0.0/24
The
24 means to search your local network (all 256 addresses after the
last dot in your local IP address) for any connected computers. After
perhaps a minute, you should get back something like this:
Starting Nmap 6.40 ( http://nmap.org ) at 2018-11-24 19:56 UTC
Nmap scan report for 192.168.0.1
Host is up (0.0013s latency).
Not shown: 996 closed ports
PORT    STATE SERVICE
22/tcp  open  ssh
53/tcp  open  domain
80/tcp  open  http
443/tcp open  https
MAC Address: F9:7F:C2:06:92:B9 (Unknown)

Nmap scan report for 192.168.0.153
Host is up (0.00042s latency).
Not shown: 997 filtered ports
PORT    STATE SERVICE
22/tcp open  ssh
MAC Address: E8:27:E7:58:D4:49 (Raspberry Pi Foundation)

Nmap scan report for 192.168.0.174
Host is up (-0.099s latency).
All 1000 scanned ports on 192.168.0.174 are filterFdomainname.pemed
MAC Address: 00:10:61:12:A9:33 (Ooma)

Nmap scan report for 192.168.0.63
Host is up (0.000050s latency).
Not shown: 998 closed ports
PORT    STATE SERVICE
139/tcp open  netbios-ssn
445/tcp open  microsoft-ds

Nmap done: 256 IP addresses (4 hosts up) scanned in 98.16 seconds
This shows that, in addition to your Linux computer (IP address 192.168.0.63) and your router (IP address 192.168.0.1), there are two other computers on your network. The Raspberry Pi is the one we are interested in, and its IP address is: 192.168.0.153. This is the IP address that the router has dynamically allocated to the Raspberry Pi with the router's dhcpcd daemon. For now, a dynamic address for the Raspberry Pi is fine, but later we'll want to make it static. And we'll use the same IP address. We can also see that the Raspberry Pi's port 22 (the SSH port) is open.
I also see some open ports that shouldn't be open (specifically 139 and 445). Port 53 of the router is to the LAN, not the WAN, to accept DNS queries. You can close ports on your Linux computer by typing, for example, to close port 445:
sudo iptables -A INPUT -p tcp --destination-port 445 -j DROP
If
this doesn't work, there are two more approaches to try. First, show
what processes are using the offending ports by typing:
sudo netstat -plnt
Then
try deleting the programs that are connecting to the ports you want
to be closed. The other approach is to install the ufw firewall and
tell it to close the ports:
sudo apt-get install ufw
sudo ufw enable
sudo ufw deny 139
sudo ufw deny 445
You should now be able to ssh over to the Raspberry Pi using the following command. Substitute the IP address of your Raspberry Pi for 192.168.0.153.
ssh [email protected]
Since
this is the first time you have connected to this Raspberry Pi, you
may get a message that says something like:
The authenticity of host '192.168.0.153 (192.168.0.153)' can't be
established.  ECDSA key fingerprint is 10:6d:c1:a1:b3:7b:3f:65:6a:57
:fd:bd:48:d8:c8:e4.
Are you sure you want to continue connecting (yes/no)?
That's
okay. Just type "yes" (without the quotes). The Raspberry
Pi will prompt you for a password. The default password is
"raspberry" (without the quotes). If you have successfully
ssh'ed to the Raspberry Pi, you can continue on with the rest of this
article.
If you want to close port 445 on the Raspberry Pi, you can type at the Raspberry Pi command line:
sudo iptables -A INPUT -p tcp --destination-port 445 -j DROP
If the Apache2 webserver is already installed and running (which you can check with "sudo systemctl status apache2"), you must disable it before installing and running Lighttpd. The command to disable Apache2 is "sudo systemctl disable apache2".
From the Raspberry Pi command line, type:
   sudo apt-get install lighttpd -y
   sudo systemctl enable lighttpd
I
had to run "apt-get --fix-broken install" before I could
install Lighttpd. This makes no sense because I did not see any
problems during the installation of Raspberry Pi OS. Clearly, there
are still some bugs in Raspberry Pi OS. Once the operating system
installation was fixed, the above commands installed Lighttpd and
told it to run automatically at boot. Sometimes, after a few reboots,
lighttpd fails to start on boot and fails to start on all subsequent
boots. If you suddenly find that you cannot get to your main webpage,
this may be the reason. This seems to occur because Lighttpd tries to
start before the network is fully up, so it can't bind to port 443.
The solution to this problem that I came up with is to add the
following code to the bottom of /etc/rc.local, right before the "exit
0" statement:
# Wait for the network to come up before starting lighttpd, otherwise
# lighttpd will not bind to port 443.
sleep 12
sudo systemctl start lighttpd
The following commands control Lighttpd. To stop Lighttpd, type:
sudo systemctl stop lighttpd
To
start Lighttpd, type:
sudo systemctl start lighttpd
To
show Lighttpd status, type:
sudo systemctl status lighttpd
If you have successfully installed Lighttpd, you should be able to enter 192.168.0.153 (substitute your Raspberry Pi's address) into an Internet browser's URL line on your Linux computer (not the Raspberry Pi) and see the Lighttpd placeholder page.
For some reason, although Lighttpd installed successfully for me, the root directory of Lighttpd (/var/www/html) was completely empty. As a result, I received a "403 Forbidden" message in my browser. If that happens to you, create an "index.html" file inside your Lighttpd root directory and make its owner "root" and group www-data. Then set protections so that root can read, write, and delete it, and www-data can read it. Do that as follows:
cd /var/www/html
sudo chown root:www-data index.html
sudo chmod 640 index.html
If you can now direct your browser to the IP address of your raspberry pi and see the test page you just created, you know Lighttpd is working correctly.
The Lighttpd configuration file is /etc/lighttpd/lighttpd.conf. This file controls how Lighttpd functions; most modifications to Lighttpd are done from this file. The "root" directory of Lighttpd is /var/www/html. This is where your index.html file that is the main page, or "home" page, of your website should go. If you open the /etc/lighttpd/lighttpd.conf file, you will see the line that causes the index.html file to be the main webpage:
index-file.names = ( "index.php", "index.html")
Create
your own index.html file in the /var/www/html directory with the
following in it.
<!DOCTYPE html>
<html lang="en">
<head>
   <title>Lighttpd Test Page</title>
</head>
<body>
   <h1>Lighttpd Test Page</h1>
   <p>If you can see this, Lighttpd has installed successfully!</p>
</body>
</html>
Now, you must set all your directory and file permissions so that a web user (user name: www-data) can access any webpage and the directory that contains it. Let's say you have all your html pages below /var/www/html in a directory called "text" and your pictures that will be inserted into your webpages in an adjacent directory to "text" called "pictures". Make the text and pictures directories readable and executable but not writeable to www-data. And you need to make the files inside them readable but not writeable to www-data. Make the owner of the "index.html" file "root" and make its group "www-data". Then set protections so that root can read, write, and delete it, and www-data can read it. For example, with the "index.html" file:
cd /var/www/html
sudo chown root:www-data index.html
sudo chmod 640 index.html
If
you can now direct your browser to the IP address of your raspberry
pi and see the test page you just created, you know Lighttpd is
working correctly.
Whenever you modify the lighttpd.conf file, you can check that it has no syntax errors by typing:
sudo lighttpd -t -f /etc/lighttpd/lighttpd.confTo cause your change to the lighttpd.conf file to take effect, you must stop and start Lighttpd as explained above. Be sure to check the status of Lighttpd to confirm that it is running.
You now know enough to create your own main webpage and see it from your Linux computer. I suggest that you do that now.
Getting Lighttpd to work with PHP7 was a very frustrating process for me because I kept getting error messages, like "503 Service Not Available" and "Access denied" when I tried to go to my main webpage. So, expect to do some debugging at this point. Don't give up hope. It is possible to get this working.
A word of warning is in order here. Linux is constantly deprecating things, and PHP is one of those things. So, in the future, you may not be able to find PHP7 in the below repository, or perhaps at all. If that happens, you will have to find and install a later version of PHP (with much more debugging required, I'm sure) that is compatible with whatever version of Lighttpd you are using.
Install PHP7 with this command:
sudo apt-get install php7.3-fpm php7.3-mbstring php7.3-mysql php7.3-curl php7.3-gd php7.3-zip php7.3-xml -yMake sure the line that says ""mod_compress"," (without the outer set of quotes) in the lighttpd.conf file is commented out. This line tells Lighttpd to compress html files before serving them to users, but unfortunately the act of compression will prevent PHP or any other dynamic content from working. Add this line "fastcgi.map-extensions = ( ".html" => ".php" )" (without the outer set of quotes) to the end of the file, so PHP code will be allowed in html files.
Now enable fastcgi and fastcgi-php:
sudo lighttpd-enable-mod fastcgi
sudo lighttpd-enable-mod fastcgi-php
To prevent the "503 Service Not Available" from appearing in your browser, modify the /etc/lighttpd/conf-available/15-fastcgi-php.conf file to look like this:
# -*- depends: fastcgi -*-
# /usr/share/doc/lighttpd/fastcgi.txt.gz
# http://redmine.lighttpd.net/projects/lighttpd/wiki Docs:Configurat
#ion Options#mod_fastcgi-fastcgi

## Start an FastCGI server for php (needs the php5-cgi package)
fastcgi.server += ( ".php" =>
        ((
                "socket" => "/var/run/php/php7.3-fpm.sock",
                "broken-scriptfilename" => "enable"
        ))
)
Be sure to get the path to php7.3-fpm.sock correct.
In the /etc/php/7.3/fpm/php.ini file, uncomment the line that says "cgi.fix_pathinfo=1". Then, to start the PHP7 service, type at the command line:
sudo pkill php-fpm
sudo systemctl restart php7.3-fpm.service
To prevent the "Access Denied" error message from appearing in your browser, modify the /etc/php/7.3/fpm/pool.d/www.conf file to uncomment the line "security.limit_extensions = .php .php3 .php4 .php5 .php7", and add ".html" to the end, so it looks like, "security.limit_extensions = .php .php3 .php4 .php5 .php7 .html". Be sure to uncomment that line by removing the semi-colon in front of it. This allows php7-fpm to execute .html code, which is less secure, but there was no other way that I could find to get PHP code to run in .html files. Now, enable PHP7 in Lighttpd by typing at the Raspberry Pi command line:
sudo lighttpd-enable-mod fastcgi
sudo lighttpd-enable-mod fastcgi-php
sudo systemctl stop lighttpd
sudo systemctl start lighttpd
You
can check that PHP is working correctly with Lighttpd by putting the
following code at the bottom of your main html page:
<?php
echo "PHP is working!!!";
?>
If
you see the words "PHP is working!!!" at the bottom of your
test page in your Internet browser, you know PHP is working. If you
get PHP working, give yourself a pat on the back. That was not easy
for me. And, I did it twice. Once for PHP5, and again for PHP7. It
was rough both times.
You should create a /var/www/html/php directory in which to put all your PHP files. Allow Internet users (www-data) read and execute access to it but not write access by giving it the following permissions:
drwxr-xr-x 2 root www-data 4096 Oct 25 12:46 php
Then,
you should add the following lines into the
/etc/lighttpd/lighttpd.conf file:
# Deny the Internet users access to everything in the php directory:
�HTTP["url"] =~ "^/php" {
   url.access-deny = ("")
}
If you would like to count the number of times visitors from the internet view one of your web pages, you may do so by creating the following PHP file and making it readable by the www-data group. Do not make it writable or executable by the www-data group! This would allow Internet users to possibly modify your PHP file and put whatever they want in it. That would compromise the security of your website. Let's call this file count.php:
<?php
/* count */
//This file counts the number of visitors to a web page.

�cfile = fopen("countlog.txt","r");
�count = fgets(�cfile,1000);
fclose(�cfile);
if(�count == false) {exit();}
�count=�count + 1 ;

//Print the number of page views and the date at which counting
//began.

echo "<div style='color:#A0A000' align='center'><font size='4vw'>
 This page has been visited �count times since 5-14-17.</div>";
echo "\n" ;

//Open countlog.txt to change new hit number
if(�count != 0)
{
   �cfile = fopen("countlog.txt","w");
   fwrite(�cfile, �count);
   fclose(�cfile);
}
?>
Then,
in the php directory create the countlog.txt file to hold your
webpage counter and make it readable and writeable to root and
www-data. On the first line of countlog.txt put a single character
"0" (without the quotes). Now, at the bottom of your html
page for which you would like to know the number of visits, add this
code:
<!-- Web page hit counter goes to countlog.txt -->
<?php
   include 'php/count.php';
?>
You
should now see the counter at the bottom of your webpage in your
Internet browser.
Since each memory address on a flash card can only be written to a finite number of times, we would very much like to minimize writing to individual memory addresses on the Raspberry Pi's flash card. We can do this two ways. First, make the partition on the card as large as possible using some partitioning program like gparted. Next, ensure that as many of the log files as possible are written directly to RAM, rather that letting them reside in the /var/log directory. Do that by putting the following lines into your /etc/fstab file on the Raspberry Pi:
# This puts logs files, etc. in RAM to prevent SD card from
# wearing out.
tmpfs    /tmp    tmpfs    defaults,noatime,nosuid,size=100m    0 0
tmpfs    /var/tmp    tmpfs    defaults,noatime,nosuid,size=30m    0 0
# I had to comment this line out, because it prevented lighttpd
# from working:
#tmpfs /var/log tmpfs defaults,noatime,nosuid,mode=0755,size=100m  0 0
# I had to comment this line out, because it prevented ssh from
# working.  I don't know why.
#tmpfs  /var/run  tmpfs  defaults,noatime,nosuid,mode=0755,size=2m  0 0
tmpfs /var/spool/mqueue tmpfs defaults,noatime,nosuid,mode=0700, gid=12,size=30m 0 0
Now,
reboot the Raspberry Pi by typing at the command line:
sudo reboot
After
rebooting, type:
df -h
If
the /tmp, /var/tmp, and /var/spool/mqueue directories are listed as
"tmpfs", then you have successfully transferred them to
RAM.
If you don't have a website that is SSL/TLS encrypted with a valid SSL/TLS certificate, many Internet browsers now throw up a warning to visitors that your site is not secure. This scares away about 80% of the people who would have otherwise gone to your webpage. SSL/TLS encrypted websites begin with "https://" on the browser's URL line. We will ultimately use Let's Encrypt to create a free SSL/TLS certificate, but before you can do that, you must have officially registered the domain name of your website. So, for testing purposes, we will now create a self-signed certificate.
Before doing anything else, make sure your version of Lighttpd supports SSL by typing, "lighttpd -v" at the Raspberry PI command line. If the response includes "(ssl)", your version of lighttpd supports SSL. If not, you need a newer version of Lighttpd.
To configure HTTPS on your Raspberry Pi, begin by creating a self-signed certificate that is valid for 365 days. Type the following at the Raspberry Pi command line:
sudo apt-get install openssl
cd /etc/lighttpd
sudo mkdir ssl
cd ssl
sudo openssl req -new -x509 -keyout server.pem -out server.pem -days 365 -nodes
sudo chown www-data:www-data server.pem
sudo chmod 644 server.pem
cd ..
sudo chown root:root ssl
sudo chmod 700 ssl
You have now created a self-signed SSL/TLS certificate in the server.pem file and protected the ssl directory so that no one but root has access to it. Limiting access to the certificate is necessary to prevent someone else from stealing your certificate and creating a website that masquerades as your website.
Next, you will make Lighttpd aware of the certificate:
cd /etc/lighttpd/conf-enabled
sudo ln -s  /etc/lighttpd/conf-available/10-ssl.conf  10-ssl.conf
cd ../conf-available
Now edit the /etc/lighttpd/conf-available/10-ssl.conf file, and in place of:
�SERVER["socket"] == "0.0.0.0:443" {
        ssl.engine  = "enable"
        ssl.pemfile = "/etc/lighttpd/server.pem"
substitute
the lines:
�SERVER["socket"] == "192.168.0.153:443" {
        ssl.engine  = "enable"
        ssl.pemfile = "/etc/lighttpd/ssl/server.pem"
        server.document-root = "/var/www/html"
If
the IP address of your Raspberry Pi is not 192.168.0.153, substitute
yours above. Now stop and start Lighttpd to cause the above
configuration changes to take effect.
On your Linux computer, you should now be able to enter "https://192.168.0.153" (substitute your Raspberry Pi's address) into your browser's URL address line and have it come back with a warning that this connection is untrusted and asking if you want to add an exception and continue. Click to add the exception and accept the SSL/TLS security certificate from the website (the certificate that you just created). After you've done that, you should see "https://192.168.0.153" (or your Raspberry Pi's address) in your browser's URL line, and your website's main page should be visible. If this happens, you have correctly configured HTTPS and installed your self-signed certificate.
Now that you've managed to get to the point where you have a working local HTTPS website, the last thing you want is for some kind of accident to corrupt your flash card, which would cause you to have to start the whole process again. So, this is a great time to make a backup of your installation. If you are an intermediate Linux user, I shouldn't have to tell you how to do this. But for the benefit of beginners, I will. Shut down your Raspberry Pi, remove the flash card, insert it into a USB flash card reader, and insert the flash card reader into a USB port of your Linux computer. Then use a program like gparted to determine the "sd" location of your flash card (or other designation, depending on which Linux distribution you are using). I'll assume that your flash card with your Raspberry Pi website is designated as "sdc". And, I'll assume that you're making a backup onto an external drive that shows up as "/mint/media/7493895735539". To make a byte-for-byte image file of your Raspbery Pi flash card, type at the Linux command line:
sudo dd if=/dev/sdc of=/media/mint/7493895735539/RaspPi_backup.img bs=4096 conv=notrunc,noerror
This
may run for as long as an hour, depending on the size of your flash
card. This is one reason I choose to use smaller 8 or 16 GB flash
cards for Raspbian installations. When the process has completed, you
should have an image of your Raspberry Pi flash card backed up. Both
of the flash card's partitions will be in the backup. If you ever
need to use your backup in your Raspbery Pi, you can copy it to a
flash card with (assuming that the flash card is still "sdc"):
sudo dd if=/media/mint/7493895735539/RaspPi_backup.img of=/dev/sdc bs=4096 conv=notrunc,noerrorBefore you can deploy your website onto the Internet you must beef up security. The first part of that process is to delete the "pi" user, create another user (I'll assume you call him "bob") with administrative privileges, and require a password for sudo access. Also, add the new user to the admin and www-data groups. You can do that as follows. At the Raspberry Pi command line, type:
sudo adduser bob
sudo adduser bob sudo
sudo adduser bob adm
sudo adduser bob www-data
You
will be prompted for a password for user "bob". Be sure to
create a strong one. Verify the groups that bob is a member of by
typing:
groups bob
By default, user bob must use a password to sudo. If you want to allow bob to to use "sudo" without entering a password (which I don't recommend after your website goes "live" on the Internet), create a file called /etc/sudoers.d/010_bob_nopasswd, and put the following line in it:
bob ALL=(ALL) NOPASSWD: ALLnopass
Later,
when you want to once again require a password for bob to sudo, you
would replace that line with:
bob ALL=(ALL) ALL
Now
set permissions for this file to prevent others from being able to
see or modify it:
sudo chown root:root 010_bob_nopasswd
sudo chmod 440 010_bob_nopasswd
Before
we go on, let's increase security by strengthening the "root"
password and preventing "root" from being able to ssh to
your Raspberry Pi. Type:
sudo passwd root
and
enter a new root password when prompted. Now become root with the "su
-" command, edit the file /etc/ssh/sshd_config, and insert a
line that says "PermitRootLogin no" (without the quotes).
Then at the Raspberry Pi command line, type:
sudo systemctl restart ssh
You
can now type "exit" to go back to being user "pi".
Log off of the Raspberry Pi and try to log on as user bob. Test that
"bob" can sudo with a password. Then log off and try to log
back on as "root". You should not be able to. If all has
gone as expected, you can now delete user pi as follows. From your
Linux computer, at the command line, type:
ssh [email protected] (and enter your password to login)
sudo userdel pi
and
enter bob's password at the prompt. Rather than deleting user "pi",
you could simply lock the "pi" account, so that it cannot
be used. To do this, as "bob", type:
sudo passwd -l pi
You
can unlock the "pi" account later, as "bob", by
typing,
sudo passwd -u piNow, install and enable the Universal Fire Wall (ufw), and close any ports that shouldn't be open, and open any ports that should be open:
   sudo apt-get install ufw
   sudo ufw enable
   sudo ufw deny 53   (substitute your port number here)
   sudo ufw deny 139   (substitute your port number here)
   sudo ufw deny 445   (substitute your port number here)
   sudo ufw allow 22
   sudo ufw allow 80
   sudo ufw allow 443
   sudo ufw status
Be aware that it is a bit risky to open port 22 (the port used by SSH) from the Internet on your router and forward it to your Raspberry Pi. New exploits come along every day, so there is no guarantee that one will not come along for SSH. However, if you would like to make changes to and reboot your website from some random place in the world, you will need to SSH into it from the Internet. If you feel the risk is too great, don't open port 22.
I don't agree with logging IP addresses, etc. of visitors to your website. But, if you want to do that, simply edit the /etc/lighttpd/lighttpd.conf file, and add the "mod_accesslog" module under the line: "server.modules = (". Then add this line somewhere in the file:
accesslog.filename = "/var/log/lighttpd/access_log"
If
you don't want user logging, simply comment out the "mod_accesslog"
line in the /etc/lighttpd/lighttpd.conf file.
Some rather unscrupulous people on the Internet have started "hot-linking" to pictures on other websites. This means that they tie up the other website's server with the task of serving pictures to users who are not even accessing the other server's website. On the off chance that you may some day post some pictures that someone might want to hot-link to, you should disable hot-linking. To do that, add the following lines to your /etc/lighttpd/lighttpd.conf file:
#### stop image hijacking (anti-hotlinking)
�HTTP["referer"] !~ "^(�|.*(yourdomainname\.com|google\.com|yahoo\.com|msn\.com|msnscache\.com))" {
      url.access-deny = ( "jpg", "png", "js", "jpeg", "gif" )
}
Any websites that you want to have access to your pictures (including your own website in place of "yourdomainname\.com") must be added into the above statement. Since you don't have a domain name yet, you can just put anything here as a place holder for the moment. Note the use of the "or" symbol, "|", to seperate the names of websites. Note also the "\" in front of ".com" to denote that the "." in ".com" is to be interpreted as part of the website name, not part of the �HTTP["referer"] command.
With all of the modifications that we have so far made to your /etc/lighttpd/lighttpd.conf file, it should now look something like this:
server.modules = (
        "mod_access",
        "mod_alias",
#        "mod_compress",
        "mod_redirect",
#        "mod_rewrite",
#        "mod_accesslog",
)
   server.document-root        = "/var/www/html"
   server.upload-dirs          = ( "/var/cache/lighttpd/uploads" )
   server.errorlog             = "/var/log/lighttpd/error.log"
   server.pid-file             = "/var/run/lighttpd.pid"
   server.username             = "www-data"
   server.groupname            = "www-data"
   server.port                 = 80

   # Deny access to all files that end in ~ or .inc :
   url.access-deny             = ( "~", ".inc" )

# Deny the Internet users access to everything in the php directory:
�HTTP["url"] =~ "^/php" {
   url.access-deny = ("")
}

accesslog.filename = "/var/log/lighttpd/access.log"

index-file.names  = ( "index.php", "index.html",
                      "index.lighttpd.html" )

#Do NOT allow users to see the source of these types of files:
static-file.exclude-extensions = ( ".php", ".pl", ".fcgi" )

# default listening port for IPv6 falls back to the IPv4 port
include_shell "/usr/share/lighttpd/use-ipv6.pl " + server.port
include_shell "/usr/share/lighttpd/create-mime.assign.pl"
include_shell "/usr/share/lighttpd/include-conf-enabled.pl"

# This allows php code in html files:
fastcgi.map-extensions = ( ".html" => ".php" )

#### stop image hijacking (anti-hotlinking)
�HTTP["referer"] !~ "^(�|.*(yourdomainname\.com|google\.com|yahoo\.com|msn\.com|msnscache\.com))" {
      url.access-deny = ( "jpg", "png", "js", "jpeg", "gif" )
}
One of the big problems that I've seen as I've surfed the Internet looking for free PHP code that can be used for various purposes on a web server is that the code isn't really "free". The code providers always add a catch. For example, if you want code that will count the visitors to your website, the code provider will put a link to his website in his code that uploads as much private information on your visitors as he can obtain. The same is true of providers of "free" visitor comments code. One of the few exceptions to this seems to be Hashover visitor comments code. Another benefit of Hashover is that it won't require a database program like MySQL. Unfortunately, I spent two days trying to get Hashover running on my server without success. So, I decided to write my own code to provide visitors with the ability to make comments on my website. It worked so well that I decided to give away the beta version for free to anyone who wants it. You can download it here.
Lighttpd has the capability of providing the website owner with some basic status information, like the number of connected users. Before this can be enabled, you have to password protect the server status page. The reason for protecting this page is that it is a bad idea to allow anyone on the Internet to know the status of your server, including getting an idea of what volume of web traffic you are receiving.
To enable status checking, create the following links:
cd /etc/lighttpd/conf-enabled
sudo ln -s  /etc/lighttpd/conf-available/10-status.conf  10-status.conf
sudo ln -s  /etc/lighttpd/conf-available/05-auth.conf 05-auth.conf
Now,
at the bottom of the lighttpd.conf file, add the following lines:
# Set up generation of password-protected server status access
# from the web page: 192.168.0.153/server-status .

# Set up to generate server status and stats that are visible only
# to a user on the internal network:
# Note that /server-status is a command, not a directory.
# To see the server status, go to 192.168.0.153/server-status
# in a web browser.
# To allow everyone in the world to see it, change the 24 to 0 .
#
# Could also try to do this with webalizer.
#
#�HTTP["remoteip"] == "192.168.0.153/24" {
status.status-url            = "/server-status"
# Now, require authorization for anyone in or outside the local
# network to see it:
auth.debug                   = 2
#auth.backend                 = "plain"
auth.backend                 = "htdigest"
#auth.backend.plain.userfile  = "/var/www/html/.lighttpdpassword"
auth.backend.htdigest.userfile  = "/etc/lighttpd/.htpassword/htpassword_file"
#Adding "?auto" stops password prompting:
#      auth.require                 = ( "/server-status?auto" =>
auth.require                 = ( "/server-status" =>
   (
                   "method"  => "digest",
                   "realm"   => "Password protected area",
                   "require" => "user=example-username"
   ),
)
# The format of the plain-text password file is one line
# containing:     user:password
# The format of the htdigest (hashed) password file is one line
# containing:  user:Password protected area:hashed_password
# To create the hashed password file, run
# /etc/lighttpd/.htpasswd/hash with the arguements:
# 'username' 'Password protected area' 'password'
# and paste the resulting line into the hashed password file.

#NOTE: You only have to enter your password ONCE during a browser
#      session to access password protected areas as many times as
#      you want.
Check that the syntax of the lighttpd.conf file is correct with:
sudo lighttpd -t -f lighttpd.conf
Now
stop and start Lighttpd to make the changes take effect.
If
you would like to access the server-status page before password
protecting it, you can remove all the password protection lines from
the lighttpd.conf file and try it. Or you can just proceed to the
next section on password protection before trying to access the
server-status page.
As you may be able to discern from the above lines in lighttpd.conf, I first created local network access to the server-status page. Then, I added password protection with a plain text password. Then, I commented out some of the lines and used an encrypted password file and provided access to the server-status page from the Internet for user "example-username" with the correct password. The final version of the lighttpd.conf file (which is shown above) allows access from the Internet to user "example-username" when he enters the correct password. The password is stored in an encrypted file. I will not take you through granting local access and creating a plain-text password file. I'll skip right to creating an encrypted password file for user "example-username" (you should use your own, hard-to-guess user name). To create the encrypted password file:
cd /etc/lighttpd
sudo mkdir .htpassword
sudo chmod 755 .htpassword
cd .htpassword
Now,
in the .htpassword directory, create a script file called hash.sh:
#!/bin/sh
user=�1
realm=�2
pass=�3
hash=`echo -n "�user:�realm:�pass" | md5sum | cut -b -32`
echo "�user:�realm:�hash"
Now,
make the hash.sh script executable. Execute the hash.sh script as
follows:
./hash.sh 'your_user_name' 'your_realm' 'your_password'
Replace
"your_realm" with the realm that you used in the
lighttpd.conf file. So, in this case, "your_realm" would be
"Password protected area" (without the quotes).
"your_user_name" is a user name that you create only for
accessing the server-status page. And "your_password" is
the password for that user. When you execute the hash.sh script, the
output will look something like this:
your_user_name:Password protected area:bb2cd41fe9ef1e2032456e37c3d3661a
The
last part of that is the encrypted password salted with
"your_user_name:Password protected area:" (where your
specific user name and protected area designation have been
substituted). Now, create a file called, "htpassword" (to
match the file name you used in the lighttpd.conf file) and copy the
whole line that you just created into the htpassword_file. Then,
protect hash.sh so that only root can read, write, or execute it.
Then set the owner and protections on the htpassword file:
sudo chown root:root htpassword
sudo chmod 644 htpassword
Last,
reboot the Raspberry Pi for the changes to take effect.
You now have a user name and password with which you can access your server-status page. To access your server-status page, from your Linux computer, open a web browser and enter: https://192.168.0.153/server-status into the URL line. Note that you should always use https to access your server status page to prevent your password from being observable to others on the Internet. If you did everything correctly, a pop-up will appear asking for your user name and password. A warning page may pop up first telling you the website is insecure. After you have entered the user name and password that you have just created, you should be looking at a page that gives you a very basic idea of how much traffic your website has been receiving and how many people are currently connected.
I have written a bash script called, "log_visits.sh" to log the number of people connected to the website at five minute intervals. This should help you to get a better idea of what kind of traffic you are getting to your website over the period of time you run it. Here it is:
#!/bin/bash
# This bash script logs the number of HTTPS connections at 5 minute
# intervals.
#
# written on 10-23-18

while [ 1 ]
do
#   netstat -s | grep "packets delivered"
   num=`sudo netstat -anp | grep :443 | grep ESTABLISHED | wc -l`
   echo -e "�num" > https_visit_log
   sleep 300
done
You
will need to create a directory where only root can see or execute
the above script. Call the directory ~/.history. (~ stands for the
currently logged-in user's home directory.) Then you would execute it
as follows:
su -
cd ~/.history
cp path_to_file/log_visits.sh .
./log_visits.sh &
The
"&" at the end of the line runs the log_visits.sh
script in the backgound, which means it is always running, like a
daemon, even after you log off. When you want to stop it, you can
type:
su -
cd ~/.history
kill -9 `sudo ps -ef | grep log_visits.sh | awk '{print �2}'`
If your website contains only static content (i.e no PHP scripts run in any of your html pages), then you can compress your html pages before you send them to visitors to your website. This saves data usage on your home Internet connection and allows faster uploading to visitors. The data usage savings would only be significant if you have a very large number of visitors. Otherwise, I really wouldn't worry about compressing html files. But, if you decide you want to compress your web pages, uncomment the "mod_compress" module in lighttpd.conf, and ensure that lighttpd.conf contains the following uncommented lines:
compress.cache-dir = "/var/www/html/cache  "
compress.filetype = ("text/plain","text/html",
                     "text/css","text/xml","text/javascript")
compress.allowed-encodings = ("gzip", "deflate")
This
will cause each webpage to be compressed and stored in
/var/www/html/cache when a visitor first requests that webpage.
Afterwards, the compressed version will be served to visitors. If you
make a change in the webpage, it will automatically be compressed and
replace the old compressed file as soon as a visitor requests the
modified webpage.
Routers dynamically assign local network IP addresses to computers that are connected to them on a first-come-first-served basis. But you need your Raspberry Pi web server to have the same local IP address every time you connect it to your router. The solution to this problem is to give the Raspberry Pi a static local IP address. This is another place that changes have occurred between Buster and Bookworm. Here is the new method of creating a static IP address. First, find your Raspberry Pi's network interfaces with the "sudo nmcli device status" command. This should show the name of the network device, which will often be something like "eth0", and the corresponding "connection", which will often be "Wired connection 1". Use the name of the connection to create a static IP address as follows. At the Raspberry Pi's command line, type:
 sudo nmcli con mod "Wired connection 1" ipv4.addresses 192.168.0.153/24
 sudo nmcli con mod "Wired connection 1" ipv4.gateway 192.168.0.1
 sudo nmcli con mod "Wired connection 1" ipv4.dns 8.8.8.8
If
the "nmcli device status" command showed that your
connection had a different name, use the name of your connection
above. Now, again substituting the name of your connection, restart
your connection with the command:
sudo nmcli c down "Wired connection 1" && sudo nmcli c up "Wired connection 1"
Verify
that the static IP address of your Raspberry Pi has been set with the
command "ip address".
A web server must have a static IP address to operate on the Internet. The reason is that when you set up your domain name with your domain name provider, part of the setup process is to point that domain name to your true IP address. If your true IP address should ever change, then your domain name would be pointing to the wrong IP address.
You can check to see if your IP address is static by going to ipcheck.com, then rebooting your router, and going back. If your IP address changes, it isn't static.
If you have a dynamic IP address, you have three options. Option 1: beg your home Internet service provider for a static IP address. You may have to pay extra for this (an option we abhor on this website!). Option 2: set up an account with an organization like dynu.com. They provide a static IP address that they link to your dynamic IP address via software that you run on your web server. I have not tried running this software on a Raspberry Pi, but I do know that they have a version that runs on Linux. Here's a link that shows you how to set it up. Option 3: switch Internet providers to one that by default (without charging more) gives you a static IP address. This option is limited by the semi-monopoly that Internet service providers have in the United States. Whichever approach you take--good luck!
Since by putting your own web server on the Internet, you are making your home network more vulnerable to intrusion, you should beef up your network security to the extent to which you are capable. Begin by updating the firmware on your router to the latest version. Unfortunately, since routers all have their individual methods of updating their firmware. I can't help you with that. If your router is too old to have a recent firmware version, I seriously suggest you buy yourself a new router. A word of warning is in order here about consumer-grade routers: they're not very secure. The American Consumer Institute recently conducted a study of 186 consumer-grade routers from 14 manufacturers and found that 5 out of 6 had known vulnerabilities. In total, the 186 routers contained over 32,000 vulnerabilities. If you feel that you are competent to upgrade to an inexpensive enterprise-grade router, I would suggest that you consider it. Then do your best to increase the security of your router with firewall settings, etc. At a minimum, block all ports except 22 (if you intend to ssh to your Raspberry Pi from the Internet), 80, and 443. You can check to see which ports on your router are open with Steve Gibson's Shieldsup.
The learning process associated with beefing up security on your home network may lead you to do a significant amount of reading. If you come to the same conclusion that I have--that there is no such thing as a secure computer, you may want to begin improving your security by assuming that your network has already been compromised and always will be. If you go this route, you may find some value in my three-USB-stick system.
Now you are finally ready to get a domain name! Before you begin, I have a word of warning: Do not check on the website of the domain name provider (AKA a domain name registrar) to see if the domain name you want is available! I recently made that mistake with cheapskatesguide.com and was told that the domain was available. Two months later, I checked back and found that cheapskatesguide.com had been "owned" since 2013, but I could purchase it for about �1300! Obviously, something is very fishy. I submitted a complaint to ICANN, which accomplished nothing. As a result, I was forced to use cheapskatesguide.org, instead of the domain name I really wanted. You should be able to safely look up a potential domain name here.
At this point, you are ready to establish an account with the domain name provider of your choice. You can google to see which provider is offering the best prices, so I won't suggest any company in particular. However, there is a free option. That is, domains that end in ".info" and a few others can be had for free. I don't know if this is free for a year, at which point you have to start paying, but I know it's free for at least a year. (UPDATE: I tried reserving a ".info" domain for free through Freenom.com and had a lot of difficulty. Although there is an option to reserve a domain for a year, I was not able to do so. When I tried to reserve the domain for 12 months, I got an error message that said, "an unknown error has been encountered". This happened twice. After the ordeal was over, I ended up with a domain that was set to expire one month and two days after the date that I had reserved it. When I went back a month later to try to renew the domain, I was unable to do so. I believe this means that with Freenom there is no way to have a free domain, long-term. Later Update: After about 4-6 months, my free website was shutdown by Freenom. The price to get it back was �9.95/yr. So, the bottom line is that you have to pay after a few months of free service. UPDATE ON 11-21-19: I recieved an email 3 days ago from Freenom stating:
Dear Sir/Madam, Since December 2, 2018 you are the registrant of the domain name: dfdn.info. Please be advised that the registration period for this domain is almost over and that the domain will expire on December 2, 2019. If you wish to keep your your domain, you should renew the domain registration for dfdn.info BEFORE December 2, 2019 00:00 GMT. Domain name renewals are free of charge and can be done in My Freenom.�I thought I no longer owned this domain. Regardless, I apparently successfully renewed it for another 12 months for free. Freenom appears to be playing some kind of game with its clients. Use Freenom at your own risk.) Also, be aware that rumor has it that search engines like Google will rank you lower in their search results if you you use a regional domain name--like ".info", ".uk", etc. (UPDATE: I was not able to upload my sitemap.txt file for my ".info" domain to the Google Search Console. I think this means that Google's search engine ignores ".info" domains completely. In fact, after one month, Google's Search Console showed no search results and no clicks on my ".info" website.) You should consider what is important to you before you proceed with the free domain option.
Another recommendation that I would make is that you find out how much money your potential choice as your domain name provider charges to allow you to move to another provider. People often switch providers, and you don't want to be held hostage.
Also, consider whether you want to have a block on the "whois" database to prevent people from spamming your email address. Some domain name registrars provide this service for free, and some don't.
You will probably want to have three ports open and forwarded to your Raspberry Pi web server. Those are 22 (for SSH), 80 (for HTTP), and 443 (for HTTPS). As I said before, if you don't need to SSH to your web server for maintenance, etc., from a remote location (meaning away from home), then you can leave port 22 closed on your router. Remember, this is better security-wise.
Some Internet service providers "block" port 80. Most likely, they do this with a setting in their router that they provided to you when they set up your home Internet service. If that's the case, it will probably be under the "firewall" portion of the router management page. Even if you are only using your ISP's router as a modem and doing routing with your own router (as is preferable for security reasons), you will still have to unblock port 80 on your ISP's router. This was a frustrating process for me, so I suggest that you try to remain calm, even though you may want to throw your router out of the window. Don't forget to reboot your router for your changes to take effect. If your ISP blocks port 80 upstream of your router, you will have to call them and ask them to unblock port 80.
Since port forwarding is accomplished differently on each router, I can't tell you exactly how to do it. But I can say that you will probably do it in the firewall section of the router's management page. You may want to look online for a manual for your particular router. Or, there is the old fall-back position: tinker with it until it works. You will know that you have been successful when you can bring up a web browser and get to your Raspberry Pi's main web page by typing into the browser's URL line "http://" or "https://" followed by your new domain name (not your local IP address). When you can SSH to your user name@ followed by your domain name in a terminal window, you have successfully opened and forwarded port 22.
UPDATE: If you are unsuccessful at unblocking port 22, you can forward any port of your choice to port 22. Let's say you choose to open port 37847, for example. Then you would go to your router's port forwarding page and forward port 37837 on the Internet side of the router to port 22 on the LAN side of the router. You can then ssh to your raspberry pi from a remote location, by typing:
ssh username@your_domain_name -p 37847
The
-p option tells the ssh daemon that you are using port 37847 to
connect with instead of port 22.
As I've said before, if you don't want visitors to your website being confronted by a warning message saying that your https webpage is insecure, which will most likely frighten them away, you will have to have a non-privately signed SSL/TLS certificate. And you will have to have a minimum strength of TLS security (the subject of the next section). I'll explain how to get a "Let's Encrypt" certificate because Let's Encrypt certificates are free (thanks to the Internet Security Research Group) and can be automatically renewed as they expire (although, unfortunately not with a web server running Lighttpd).
With Rasbian Jessie, installing a Let's Encrypt certificate was a bit of a nightmare. Certbot was not included in the Rasbian repository and certbot broke frequently. With Raspbbery Pi OS Bookworm, all you have to do to install certbot is type at the Raspberry pi command line, "sudo apt-get install certbot". Then, you run certbot to install the Let's Encrypt certificates for your website. Several ways of doing this are possible, but I am still using the command that has continued to work for me for years:
sudo certbot certonly --no-self-upgrade --manual -d your_domain_name
Don't
forget to insert your actual website name in place of
"your_domain_name" above.
Certbot will now give you directions to follow. Follow them carefully.
I had to use the manual option above because of a directory permission problem. Without this option, no certificates were created, and no error messages were generated to explain why. This was very frustrating and time consuming. It was made even more frustrating by the fact that if you try to run certbot more than 5 times in an hour or 50 times in a week, you are locked out until the next hour or week.
After certbot runs successfully, you will have four certificates in the directory /etc/letsencrypt/live/your_domain_name.
You must now tell Lighttpd where the certificates are. You must also concatenate two of the certificates because that is what Lighttpd is expecting to see. Do this as follows.
su
cd /etc/letsencrypt/live/your_domain_name
cat cert.pem privkey.pem > fullkeychain.pem
In
/etc/lighttpd/conf-available/10-ssl.conf, replace the single line
that was pointing to your privately-signed certificate with the
following two lines:
    ssl.pemfile = "/etc/letsencrypt/live/cheapskatesguide.org/fullkeychain.pem"
    ssl.ca-file = "/etc/letsencrypt/live/cheapskatesguide.org/chain.pem"
Now
stop and start Lighttpd. At this point, the Let's Encrypt SSL/TLS
certificates are installed and recognized by Lighttpd. You should now
be able to go to your HTTPS website with most browsers and not see a
warning message saying your website is insecure. But some browsers
are more paranoid than others. To satisfy them, you will have to
strengthen your TLS security further.
To test the relative security of your website (actually, your web server), go to this webpage. At this point, I received a "B" grade on the test. This didn't satisfy the version of Firefox that I was using to view my webpage, so it still threw up a security warning message. To get an "A" on the test and satisfy Firefox, I had to read and implement some of the suggestions on this website. Here is what I did.
Replace the ssl.cipher-list line in 10-ssl.conf with:
ssl.cipher-list = "EECDH+AESGCM:EDH+AESGCM:AES128+EECDH:AES128+EDH"
Generate
a stronger Diffie-Hellman parameter for key exchange as follows. This
process should take about 15 minutes.
su
cd /etc/letsencrypt/live/your_domain_name
openssl dhparam -out dhparam.pem 4096
Then,
add the following two lines into 10-ssl.conf:
ssl.dh-file = "/etc/ssl/certs/dhparam.pem"
ssl.ec-curve = "secp384r1"
Now
stop and start Lighttpd and check the status to make sure it's
running. Take the test again, and you should get an "A"
grade this time. Your browser should no longer throw up a security
warning when you go to your website. Note that TLS 1.0 and TLS 1.1
are no longer considered to be secure, so you want them to be
disabled in Lighttpd. With Buster (Raspberry Pi OS), you do not have
to add lines to your 10-ssl.conf file to disable TLS 1.0 and TLS 1.1
because they are disabled by default.
I have a feeling that some of your periodic server maintenance will be checking your server security to make sure you're still getting an "A" grade on the test.
Much can be written about this, but I'll keep this section very simple. One way of monitoring your website is to notice what kind of data flow rate it has. You can do this with various programs. A very simple one is "bmon". Install it with "sudo agpt-get install bmon", then type "bmon" at the Raspberry Pi command line. It shows the amount data being received and transmitted by your website. It should be less than about 200 b/s almost all of the time when no one is accessing a webpage. If it's much higher than that, you're most likely having some kind of problem. You should endeavor to determine the source of the higher-than-normal data flow rates. Are they due to a virus? Has your website been co-opted into a "bot" network for use in DDOS attacking other servers? You need to get to the bottom of this.
Okay. At this point, we are through the, at times, night-marish setup of your website! You should feel a real sense of accomplishment if you've made it this far! Congratulations!
This is the perfect time to make a backup before we begin the fun part of submitting your website to Google and trying a hand at search engine Optimisation. Most importantly, this is the time to make a backup before your web server installation has a chance to get corrupted. Follow the same procedure as the first backup.
The advice that is often given is that you keep your Raspberry Pi OS (or any other software installation) up to date to keep your level of security as high as possible. Update Raspberry PI OS as follows (and hope things don't stop working):
sudo apt-get update
sudo apt-get upgrade
You
should probably also stop and start Lighttpd and check its status.
You may even want to reboot.
If you're brave, you can also update Raspbian automatically with:
sudo apt-get install unattended-upgrades
To
see how to configure your automatic upgrades, read this.
If you want to receive emails when there are changes, type:
sudo apt-get install apt-listchanges
For the purposes of this article, I have assumed that you will write your own html webpages. Almost no one does this. But it does make much more compact and simple webpages. You also learn a great deal. One thing that you learn is how to create mobile-friendly webpages. Another thing you learn is that your webpages may look different in different browsers. It turns out that making your webpage look good in several browsers simultaneously can be quite a chore. One thing I've seen myself is that my webpages look better on my phone and other people's phones when I ignore advice to use variable-width text that depends on the size of the browser window. I'm sure you will spend a large amount of time experimenting to see what looks best to you.
Google claims that it ranks website higher in its search results when they have a privacy page, a site map, and a robots file. I can't say whether this is true, but one thing I can say is that the search results of your webpage won't come out looking the way you want if you don't have a sitemap. A sitemap tells robots (e.g. Google's robot) which pages you want listed in the search engine results and makes them easier for robots to find.
A site map is a file that resides in the website's root directory (remember, that's /var/www/html for Lighttpd). The easiest type of sitemap is just a plain text file containing every html webpage that you would like to have listed by Google. A sitemap file can look something like this:
https://cheapskatesguide.org/
https://cheapskatesguide.org/contact.html
https://cheapskatesguide.org/privacy-policy.html
https://cheapskatesguide.org/articles/avoid-tracking.html
https://cheapskatesguide.org/articles/beauty-is-only-skin-deep.html
https://cheapskatesguide.org/articles/buy-at-the-knee.html
https://cheapskatesguide.org/articles/buy-a-used-computer.html
https://cheapskatesguide.org/articles/computers-and-adulthood.html
https://cheapskatesguide.org/articles/cutting-the-cord.html
That's
the top of the sitemap.txt file for cheapskatesguide.org. Notice that
the first line is "https://cheapskatesguide.org/", not
"https://cheapskatesguide.org/index.html".
A robots file is pretty much the opposite of a sitemap file. It contains a list of everything on your website that you don't want robots to look at. It is also a text file (called robots.txt) that resides in your website's root directory. If you're okay with robots going anywhere on your website, your robots.txt will look like this:
User-agent: *
Disallow:

SITEMAP: https://cheapskatesguide.org/sitemap.txt
A privacy page has become even more important recently because the EU (the European Union) has decided to levy heavy fines against organizations that don't follow their rules designed to make websites more transparent to users. So, you want your users to know exactly what data you extract from their visits and what you do with it. Cheapskatesguide.org follows the easiest approach of not knowingly extracting any user data, certainly not logging any, and so, not being able to use any user data for anything. (Update on 3-3-20: I had to make an exception to this for brief periods of time when I suspect hacking is occuring.) Your privacy page tells users your policies regarding their data.
Now that your website is up and running and you have a site map, you're ready to tell Google that you exist. Or, you could wait weeks, or perhaps months, for Google's robot to find your site on its own. You let Google know about your website by creating a Google account for your website (or using your pre-existing account, if you prefer) and uploading your site map file. There are other ways, but that's the easiest. Google's "search console" webpage is where you go to do that. It's here. Google will also make you prove that you are the owner of your website by requiring you to insert a code into the header of your main page (or some other way).
You can also conduct website analysis from Google's search console. By website analysis, I mean looking up what Google thinks is the amount of traffic your website is receiving. Be prepared for dismally small numbers. You can also see if Google thinks there is something wrong with your webpages that keeps it from including them in it's search engine results. There are many, many other websites that talk about this, so I won't do that here. There are also many organizations that will, for a fee, help you with website analysis.
Creating a mobile-friendly website is important for Google to rank you "high" in it's search engine results. As you will discover, new small websites are highly discriminated against in Google searches. Another thing you will learn is that Google doesn't give an explanation of exactly what criteria they use to rank websites. However, there are no shortage of websites offering their opinions of how to get ranked higher. So, google "search engine Optimisation" and see what you find.
This concludes my article on how to create and host your own website at home for �2 a year. Having been through the process myself, I know it's a long and at times torturous route. But, the amount that you learn about web servers and how the Internet works is tremendous. Thank you for allowing me to help guide you through it.